Grove - 433MHz Simple RF Link Kit
Introduction
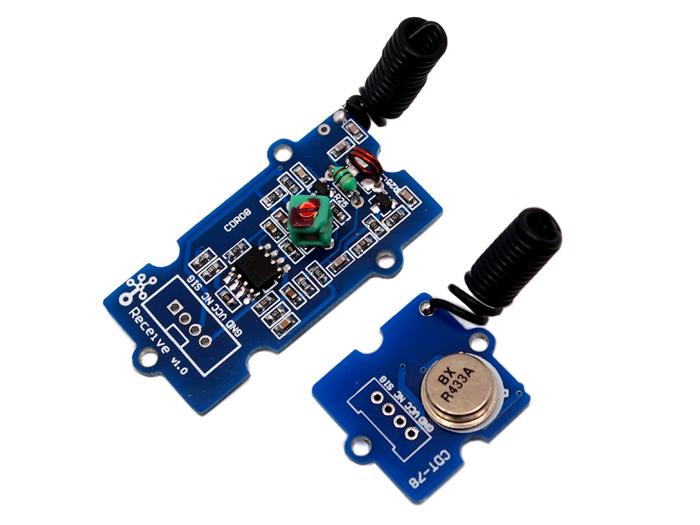
This kit is used for one way wireless communication at a frequency of 433MHz and includes a transmitter module and a receiver module. The twig configuration of this kit allows for around 40 meters of transmitting distance indoors, or around 100 meters outside.

Version Tracker
| Revision | Description | Release |
|---|---|---|
| v0.9b | Initial public release | 03,Oct,2011 |
Features
- GROVE compatible interface.
- Uses ASK (Amplitude Shift Keying) Modulation.
- One way communication.
Tip
More details about Grove modules please refer to Grove System
Specifications
Transmitter Module
| Item | Min | Typical | Max | Unit |
|---|---|---|---|---|
| Working Voltage | 3.0 | 5.0 | 12.0 | VDC |
| Current | 3 | / | 10 | mA |
| Work Mode | ASK | / | ||
| Transmit Power(Max) | 15 | mW | ||
| Working Distance | 40 | / | 100 | m |
Receiver Module
| Item | Typical | Unit |
|---|---|---|
| Working Voltage | 5 | VDC |
| Quiescent Current | 5 | mA |
| Receiver Sensitivity | -105 | dBm |
| Operating frequency | 433.92 | MHz |
Application Ideas
- Remote control
- Remote automation
- Alarm
Usage
The transmitter and receiver modules both rely on a single wire for communication. Though using the UART supplied by the Arduino platform can work, it is recommended, instead, to use the VirtualWire library which uses Amplitude Shift Keying for modulation which provides better communication.
Both the transmitter and receiver modules require three wires: Vcc, Ground, and signal. Pin 2 of both parts of the kit are not connected.
- Connect the Transmitter module to Digital I/O 2 of the Grove-Base Shield V2 on the Arduino being used for transmission.
Error creating thumbnail: Invalid thumbnail parameters
- Connect the Receiver module to Digital I/O 2 of the Grove-Base Shield V2 on the receiving Arduino.
Error creating thumbnail: Invalid thumbnail parameters
- Download the VirtualWire library and unzip it into the libraries file of Arduino IDE by the path: ..\arduino-1.0\libraries. Please reference here.
- Upload the code below for transmitter module:
    #include <VirtualWire.h>

    //Grove - 315(433) RF link kit Demo v1.0
    //by :http://www.seeedstudio.com/
    //connect the sent module to D2 to use
    #include <VirtualWire.h>

    int RF_TX_PIN = 2;

    void setup()
    {
      vw_set_tx_pin(RF_TX_PIN); // Setup transmit pin
      vw_setup(2000); // Transmission speed in bits per second.
    }

    void loop()
    {
      const char *msg = "hello";
      vw_send((uint8_t *)msg, strlen(msg));  // Send 'hello' every 400ms.
      delay(400);

    }
- Upload the code below for receiver module:
    //Grove - 315(433) RF link kit Demo v1.0
    //by :http://www.seeedstudio.com/
    //connect the receive module to D2 to use ..
    #include <VirtualWire.h>

    int RF_RX_PIN = 2;

    void setup()
    {
      Serial.begin(9600);
      Serial.println("setup");
      vw_set_rx_pin(RF_RX_PIN);  // Setup receive pin.
      vw_setup(2000); // Transmission speed in bits per second.
      vw_rx_start(); // Start the PLL receiver.
    }

    void loop()
    {
      uint8_t buf[VW_MAX_MESSAGE_LEN];
      uint8_t buflen = VW_MAX_MESSAGE_LEN;
      if(vw_get_message(buf, &buflen)) // non-blocking I/O
      {
        int i;
        // Message with a good checksum received, dump HEX
        Serial.print("Got: ");
        for(i = 0; i < buflen; ++i)
        {
          Serial.print(buf[i], HEX);
          Serial.print(" ");
          //Serial.print(buf[i]);
        }
        Serial.println("");
      }
    }
- Open the serial monitor of receiver module to see the result.
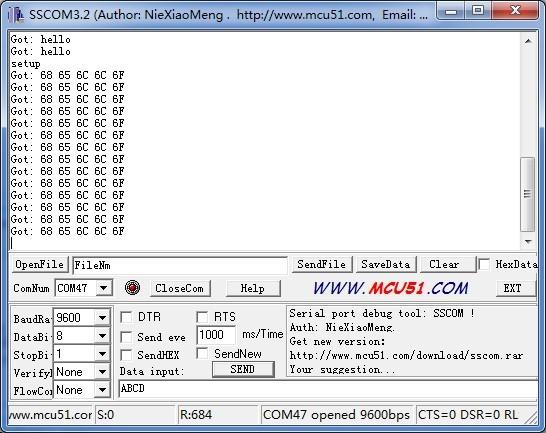
This is just a simple transmitter and receiver instance as a reference.
Resources
Help us make it better
Welcome to the new documentation system of Seeed Studio. We have made a lot of progress comparing to the old wiki system and will continue to improve it to make it more user friendly and helpful. The improvement can't be done without your kindly feedback. If you have any suggestions or findings, you are most welcome to submit the amended version as our contributor via Github or give us suggestions in the survey below, it would be more appreciated if you could leave your email so that we can reply to you. Happy Hacking!