RS232 Shield
Introduction
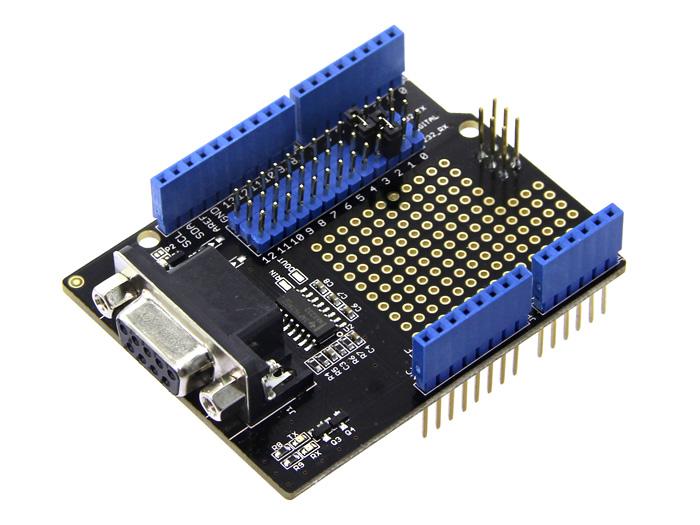
RS232 Shield is a standard communication port for industry equipment.This module is base on MAX232,which is a dual driver/receiver that includes a capacitive voltage generator to supply TIA/EIA-232-F voltage levels from a single 5-V supply. The shield integrates DB9 connectors (female) that provide connection to various devices with RS232 interface. Also the RS232 headers will facilitate your connections and commissioning. It provides the welding areas to make full use of extra space on it, which is highly convenient for prototyping.

Specifications
- Meets or Exceeds TIA/EIA-232-F and ITU
- Operates Up To 120 kbit/s
- Low Supply Current
- LED Indicator
- DB9 Connectors(female)
- Welding Areas
Compatibility
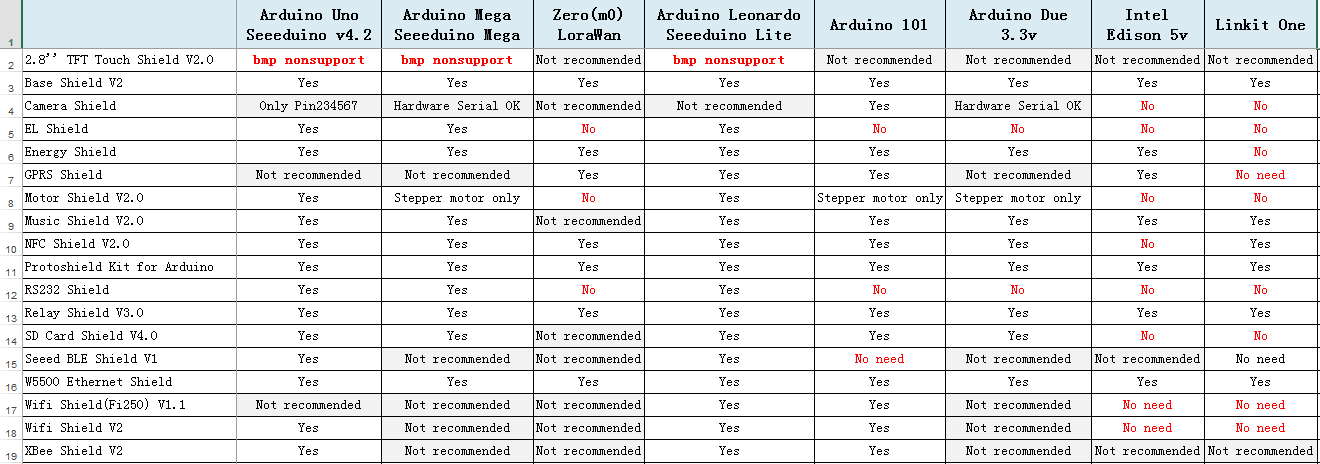
We have produced a lot of extension board that can make your platform board more powerful, however not every extension board is compatible with all the platform board, here we use a table to illustrate how are those boards compatible with platform board.
Note
Please note that “Not recommended” means that it might have chance to work with the platform board however requires extra work such as jump wires or rewriting the code. If you are interested in digging more, welcome to contact with techsupport@seeed.cc.
Click to see full picture
Interface Function
Usage
First,we can test it by computer.
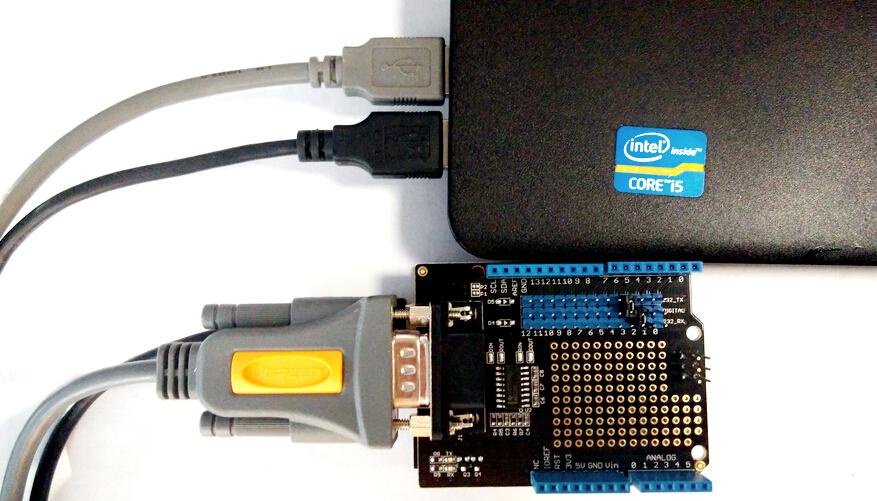
Hardware Installation
- Seeeduino v3.0,Mini usb Cable,RS232 Shield,RS232 to USB Cable.
- Make the connections as below. The jumper hats can be used to select the software serial port from the digital pins. You can set them to D7(232_TX) and D6(232_RX), and modify the code to “SoftwareSerial mySerial(7, 6); // 232_TX, 232_RX“
Software Part
- 1) Open Arduino IDE, and paste the code below.
#include <SoftwareSerial.h>

SoftwareSerial mySerial(7, 6); //232_TX,232_RX

void setup()
{
    // Open serial communications and wait for port to open:
    Serial.begin(9600);
    while (!Serial) {
        ; // wait for serial port to connect. Needed for Leonardo only
    }


    Serial.println("Goodnight moon!");

    // set the data rate for the SoftwareSerial port
    mySerial.begin(9600);
    mySerial.println("Hello, world?");
}

void loop() // run over and over
{
    if (mySerial.available())
    Serial.write(mySerial.read());
    if (Serial.available())
    mySerial.write(Serial.read());
}
- 2) Upload the code. Note that you should select the correct board type and COM port.
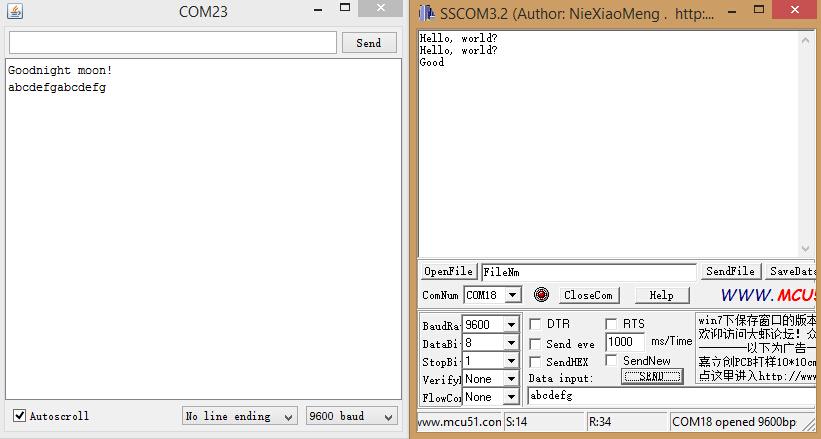
- 3) Open the Serial Monitor.
You can see :
Resources
Help us make it better
Welcome to the new documentation system of Seeed Studio. We have made a lot of progress comparing to the old wiki system and will continue to improve it to make it more user friendly and helpful. The improvement can't be done without your kindly feedback. If you have any suggestions or findings, you are most welcome to submit the amended version as our contributor via Github or give us suggestions in the survey below, it would be more appreciated if you could leave your email so that we can reply to you. Happy Hacking!