Grove - UV Sensor
Introduction

The Grove – UV Sensor is used for detecting the intensity of incident ultraviolet(UV) radiation. This form of electromagnetic radiation has shorter wavelengths than visible radiation. The Grove - UV Sensor is based on the sensor GUVA-S12D which has a wide spectral range of 200nm-400nm. The module outputs electrical signal which varies with the UV intensity, which gives your suggestion if it is a good idea to beach today.

Features
- High stability
- Good sensitivity
- Low power consumption
- Schottky type photodiode sensor
- Wide response range
- Grove Interface
Tip
More details about Grove modules please refer to Grove System
Specifications
| Item | Min | Typical | Max | Unit |
|---|---|---|---|---|
| Operating Voltage | 3.0 | 5.0 | 5.1 | VDC |
| Current | 0.31 | mA | ||
| Output Voltage | mV | |||
| Response wavelength | 240 | ~ | 370 | nm |
| Working Temperature | -30 | ~ | 85 | ℃ |
Platforms Supported
Application Ideas
- UV sensors are used in many different applications, include pharmaceuticals, automobiles, and robotics.
- UV sensors are also used in the printing industry for solvent handling and dyeing processes.
- In addition, UV sensors are used in the chemical industry for the production, storage, and transportation of chemicals as well.
The theory of UV sensor is: In sunlight, the UV index and Photocurrent are a linear relationship.

About our Grove - UV Sensor, we have converted Photocurrent to corresponding voltage value collected by Arduino/Seeeduino. The output voltage and the UV index is linear:
illumination intensity = 307 * Vsig
Vsig is the value of voltage measured from the SIG pin of the Grove interface, unit V. illumination intensity unit: mW/m2 for the combination strength of UV light with wavelength range: 240nm~370nm
Note
To calculate the UV index value, please refer to US EPA. It is hard to say that the measurement from this sensor can be converted to the EPA standard UV index, but can be estimated roughly.UV Index = illumination intensity / 200
Getting Started
Note
This chapter is based on Win10 and Arduino IDE 1.6.9
We will show you how this Grove - UV Sensor works through a simple demo. First of all, you need to prepare the below stuffs:
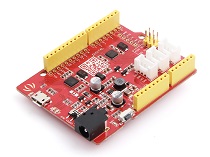
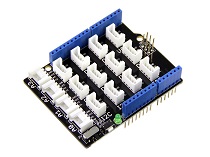
| Seeeduino V4 | Grove - UV Sensor | Base Shield |
|---|---|---|
 |
 |
 |
| Get ONE Now | Get ONE Now | Get ONE Now |
Connection
Thanks to the benefits of Grove series modules, you don’t need to make soldering or bread board, what you need to do is to connect the modules to the right port of Base Shield. For this demo, we only need one Grove module. - Connect Grove UV Sensor to A0 port of Grove - Base Shield. - Plug the Grove - Base Shield into Arduino/Seeeduino and connect them to PC by using a USB cable. - The demo code is shown below.

Upload the sketch to Arduino and open the serial port to monitor the data
// modified by Victor
// to calculate UV index directly
void setup(){

    Serial.begin(9600);
}

void loop()
{
    int sensorValue;
    long  sum=0;
    for(int i=0;i<1024;i++)// accumulate readings for 1024 times
    {
        sensorValue=analogRead(A0);
        sum=sensorValue+sum;
        delay(2);
    }
    long meanVal = sum/1024;  // get mean value
    Serial.print("The current UV index is:");
    Serial.print((meanVal*1000/4.3-83)/21);// get a detailed calculating expression for UV index in schematic files.
    Serial.print("\n");
    delay(20);

}
Resources
- Grove - UV Sensor v1.1 PCB and schematics(current version) in Eagle format
- Grove - UV Sensor v1.1 PCB(current version) in PDF format
- Grove - UV Sensor v1.1 schematics(current version) in PDF format
- Grove - UV Sensor v1.1 Sensor Datasheets(current version)
- US EPA Suggestions About UV Radiation
- Grove - UV Sensor v1.0 schematics and datasheets(older version)
| Arduino | Wio | BeagleBone | Raspberry Pi | LinkIt ONE |
|---|---|---|---|---|
Caution
The platforms mentioned above as supported is/are an indication of the module's hardware or theoritical compatibility. We only provide software library or code examples for Arduino platform in most cases. It is not possible to provide software library / demo code for all possible MCU platforms. Hence, users have to write their own software library.
Help us make it better
Welcome to the new documentation system of Seeed Studio. We have made a lot of progress comparing to the old wiki system and will continue to improve it to make it more user friendly and helpful. The improvement can't be done without your kindly feedback. If you have any suggestions or findings, you are most welcome to submit the amended version as our contributor via Github or give us suggestions in the survey below, it would be more appreciated if you could leave your email so that we can reply to you. Happy Hacking!