Grove - Temperature and Humidity Sensor Pro
Introduction

This is a powerful sister version of our Grove - Temperature and Humidity Sensor. It has more complete and accurate performance than the basic version. The detecting range of this sensor is 5% RH - 99% RH, and -40°C - 80°C. And its accuracy reaches up to 2% RH and 0.5°C. A professional choice for applications that have relatively strict requirements.

Specification
| Item | Min | Norm | Max | Unit |
|---|---|---|---|---|
| VCC | 3.3 | - | 6 | V |
| Measuring Current Supply | 1 | - | 1.5 | mA |
| Standby Current Supply | 40 | - | 50 | uA |
| Measuring range (Humidity) | 5% | - | 99% | RH |
| Measuring range (Temperature) | -40 | - | 80 | °C |
| Accuracy (Humidity) | - | - | ±2% | RH |
| Accuracy (Temperature) | - | - | ±0.5 | °C |
| Resolution (Humidity) | - | - | 0.1% | RH |
| Resolution (Temperature) | - | - | 0.1 | °C |
| Repeatability (Humidity) | - | - | ±0.3% | RH |
| Repeatability (Temperature) | - | - | ±0.2 | °C |
| Long-term Stability | - | - | ±0.5% | RH/year |
| Signal Collecting Period | - | 2 | - | S |
| Respond Time 1/e(63%) | 6 | - | 20 | S |
Tip
More details about Grove modules please refer to Grove System
Platforms Supported
Getting Started
Here are the getting started user guides.
We provide 2 demos, include both arduino and raspberry pi platforms.
With Arduino
We will show you how this Grove - temperature and humidity Sensor pro works through a simple demo. First of all, you need to prepare the below stuffs:
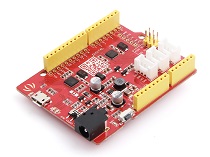
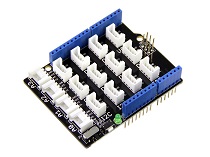
| Seeeduino V4 | Grove - DHT Sensor pro | Base Shield |
|---|---|---|
 |
 |
 |
| Get ONE Now | Get ONE Now | Get ONE Now |
-
Connect the Temperature and Humidity Sensor Pro to A0 of Grove - Base Shield. Then plug Grove - Base Shield into Arduino and connect Arduino to PC using a USB cable.

-
Please follow how to install an arduino library procedures to install library.
-
Download Seeed DHT library for arduino boards with 16MHz XTAL; Another library - DHTlib is also available instead of Seeed DHT library. This library supports both 16MHz and 8MHz Arduino (eg. Seeeduino Stalker)
-
Restart the Arduino IDE. Open “ DHTtester” example via the path: File –> Examples –> Grove_Humidity_Temperature_Sensor-master –> DHTtester. Through this demo, we can read the temperature and relative humidity information of the environment.

Note
This Grove - Temperature and Humidity Sensor Pro and our another product Grove-Temperature and Humidity Sensor are sharing this library. No matter which product you are using, make sure that you have made the definition line of the sensor of your board into effect and commented out the definition lines of other specs. For example, the sensor we used on Grove - Temperature and Humidity Sensor Pro is DHT 22. So the definition part of the sensor spec should be:
//#define DHTTYPE DHT11   // DHT 11
#define DHTTYPE DHT22   // DHT 22  (AM2302)
//#define DHTTYPE DHT21   // DHT 21 (AM2301)or
- Upload it into your Arduino board.
- Here is the result.

With Raspberry Pi
First, You need to prepare the below stuffs:
| Raspberry pi | Grove - DHT Sensor pro | Grovepi+ |
|---|---|---|
 |
|
 |
| Get ONE Now | Get ONE Now | Get ONE Now |
-
Follow instruction to configure the development environment.
-
Plug grove DHT pro to the socket D4 of grovepi+.
- Navigate to the demos’ directory:

cd yourpath/GrovePi/Software/Python/
- To see the code
nano grove_dht_pro.py # "Ctrl+x" to exit #
import grovepi

# Connect the Grove Temperature & Humidity Sensor Pro to digital port D4
# SIG,NC,VCC,GND
sensor = 4

while True:
    try:
        [temp,humidity] = grovepi.dht(sensor,1)
        print "temp =", temp, " humidity =", humidity

    except IOError:
        print "Error"
- Run the demo.
sudo python grove_dht_pro.py
- Here is the Result.

Resources
- Temp Humi Pro in eagle format
- Temp Humi Pro PCB in PDF format
- Temp Humi Pro Schematic in PDF format
- Humidity Temperature Sensor pro library
- AM2302-CN.pdf
- AM2302-EN.pdf
| Arduino | Wio | BeagleBone | Raspberry Pi | LinkIt ONE |
|---|---|---|---|---|
Caution
The platforms mentioned above as supported is/are an indication of the module's hardware or theoritical compatibility. We only provide software library or code examples for Arduino platform in most cases. It is not possible to provide software library / demo code for all possible MCU platforms. Hence, users have to write their own software library.
Help us make it better
Welcome to the new documentation system of Seeed Studio. We have made a lot of progress comparing to the old wiki system and will continue to improve it to make it more user friendly and helpful. The improvement can't be done without your kindly feedback. If you have any suggestions or findings, you are most welcome to submit the amended version as our contributor via Github or give us suggestions in the survey below, it would be more appreciated if you could leave your email so that we can reply to you. Happy Hacking!