Grove - PIR Motion Sensor
Introduction

This sensor allows you to sense motion, usually human movement in its range. Simply connect it to Grove - Base shield and program it, when anyone moves in its detecting range, the sensor will output HIGH on its SIG pin.

Features
- Grove compatible interface
- Adjustable detecting distance
- Adjustable holding time
Tip
More details about Grove modules please refer to Grove System
Specification
| Parameter | Value/Range |
|---|---|
| Operating Voltage | 3V–5V |
| Operating Current(VCC = 3V) | 100uA |
| Operating Current(VCC = 5V) | 150uA |
| Measuring Range | 0.1 - 6m |
| Default detecting distance | 3m |
| Holding Time | 1 - 25s |
| Working Wave Length | 7 - 14um |
| Detecting Angle | 120 degrees |
Platforms Supported
Getting Started
With Arduino
The following sketch demonstrates a simple application of sensing motion. When someone moves in its detecting range, it will output High through its SIG pin and the LED will light. Otherwise, it will output LOW. Then you can use it to detect the motion of people.
Connections
Here we will show you how this Grove - PIR MOTION SENSOR works via a simple demo. First of all, we need to prepare the below stuffs:
| Seeeduino V4 | Grove - PIR MOTION SENSOR | Base Shield |
|---|---|---|
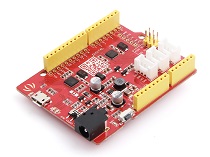 |
 |
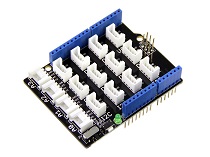 |
| Get ONE Now | Get ONE Now | Get ONE Now |
- Connect Grove - PIR Motion Sensor to D2 port of base shield.
- Connect Grove - LED to D4 port of base shield.
- Plug the base Shield into Arduino.
- Connect Arduino to PC by using a USB cable.

Software
- upload the code into Arduino.
/*macro definitions of PIR motion sensor pin and LED pin*/
#define PIR_MOTION_SENSOR 2//Use pin 2 to receive the signal from the module
#define LED 4//the Grove - LED is connected to D4 of Arduino


void setup()
{
    pinMode(PIR_MOTION_SENSOR, INPUT);
    pinMode(LED,OUTPUT);
}

void loop()
{
    if(isPeopleDetected())//if it detects the moving people?
        digitalWrite(LED, HIGH);
    else
        digitalWrite(LED, LOW);
}


/***************************************************************/
/*Function: Detect whether anyone moves in it's detecting range*/
/*Return:-boolean, true is someone detected.*/
boolean isPeopleDetected()
{
    int sensorValue = digitalRead(PIR_MOTION_SENSOR);
    if(sensorValue == HIGH)//if the sensor value is HIGH?
    {
        return true;//yes,return true
    }
    else
    {
        return false;//no,return false
    }
}
- The led will turn on when we walk around.
Note
The detecting distance and holding time can be adjusted by adding two extra potentiometers on board. For the details please refer to the V1.2 Eagle below. The module can also be set as retriggerable or un- retriggerable by changing the jumper hat.
With Raspberry Pi
Connection
First of all, we need to prepare the below stuffs:
| Raspberry pi | Grove - PIR MOTION SENSOR | GrovePi_Plus |
|---|---|---|
 |
|
 |
| Get ONE Now | Get ONE Now | Get ONE Now |
- Follow instruction to configure the development environment.
- Plug the sensor to grovepi+ socket D8 by using a grove cable.

Software
- Navigate to the demos’ directory:
cd yourpath/GrovePi/Software/Python/
- To see the code
nano grove_pir_motion_sensor.py # "Ctrl+x" to exit #
import time
import grovepi

# Connect the Grove PIR Motion Sensor to digital port D8
# SIG,NC,VCC,GND
pir_sensor = 8

grovepi.pinMode(pir_sensor,"INPUT")

while True:
    try:
        # Sense motion, usually human, within the target range
        if grovepi.digitalRead(pir_sensor):
            print 'Motion Detected'
        else:
            print '-'

        # if your hold time is less than this, you might not see as many detections
        time.sleep(.2)

    except IOError:
        print "Error"
- Run the demo.
sudo python grove_pir_motion_sensor.py
Resources
- [Eagle] Grove - PIR Motion Sensor Eagle File v1.2
- [Easyeda] Schematics at Easyeda
- [PDF] Grove - PIR Motion Sensor v1.2 Schematics
- [PDF] Grove - PIR Motion Sensor Eagle V1.2 PCB
- [Library] Github repository for PIR Motion Sensor
- [Datasheet] BISS0001 Datasheet
- [Datasheet] Fresnel lens 8120 Datasheet
| Arduino | Wio | BeagleBone | Raspberry Pi | LinkIt ONE |
|---|---|---|---|---|
Caution
The platforms mentioned above as supported is/are an indication of the module's hardware or theoritical compatibility. We only provide software library or code examples for Arduino platform in most cases. It is not possible to provide software library / demo code for all possible MCU platforms. Hence, users have to write their own software library.
Help us make it better
Welcome to the new documentation system of Seeed Studio. We have made a lot of progress comparing to the old wiki system and will continue to improve it to make it more user friendly and helpful. The improvement can't be done without your kindly feedback. If you have any suggestions or findings, you are most welcome to submit the amended version as our contributor via Github or give us suggestions in the survey below, it would be more appreciated if you could leave your email so that we can reply to you. Happy Hacking!