Grove - OLED Display 1.12"
Introduction

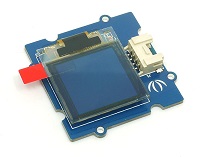
Our new 1.12” OLED displays are perfect when you need a small display with 16 grayscale. The visible portion of the OLED measures 1.12” diagonal and contains 96x96 grayscale pixels. Because the display uses OLEDs, there is no backlight, and the contrast is very high.
This OLED uses the SSD1327 driver chip, which manages the display. You can talk to the driver chip using 4-wire I2C (clock, data, power, and GND pins).
- Communicate Mode: I2C
- Grayscale Display: 16 Gray shades.
- Supports both Normal and Inverse Color Display.
- Supports Continuous Horizontal Scrolling.
- Grove compatible Interface

Specifications
| Item | Value |
|---|---|
| Operating Voltage | 3.3/5 V |
| Dot Matrix | 96x96 |
| Display Color | 16 Grayscale |
| OLED Display | LY120-96096 |
| Driver Chip | SSD1327Z |
| Dot Size | 0.15(W)mm x 0.15(H)mm |
| Dot Pitch | 0.75(W)mm x 0.175(H)mm |
| Operating Temperature | -40~70 oC |
Tip
More details about Grove modules please refer to Grove System
Platforms Supported
Getting Started
Note
This chapter is based on Win10 and Arduino IDE 1.6.9
Connection
Here we will show you how this Grove - OLED Display works via a simple demo. First of all, you need to prepare the below stuffs:
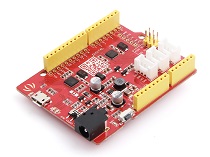
| Seeeduino V4 | Grove - OLED Display 1.12`` | Base Shield |
|---|---|---|
 |
 |
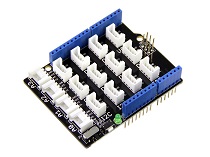 |
| Get ONE Now | Get ONE Now | Get ONE Now |
This is an easy-to-use module, what you need to do is connect the module to I2C port of a Base Shield. There’re 4 pins, defined as below.
| pin | Function | Note | Cable color |
|---|---|---|---|
| pin1 | SCL | I2C Clock | YELLOW |
| pin2 | SDA | I2C Data | WHITE |
| pin3 | VCC | Power, 5V/3.3V | RED |
| pin4 | GND | Ground | BLACK |
Grove - OLED Display 1.12`` is an I2C module, we connect it to I2C port at this demo.

Software
- Please follow how to install an arduino library procedures to install library.
-
We provide an Arduino Library for this Grove - OLED Display 1.12inch, click on the below button to download it.

-
Unzip the file and put to libraries folder of your Arduino IDE. There’re many examples in this library, which is consist of
- OLED_Bitmap_Inverse_Display
- OLED_Draw_Bitmap
- OLED_Hello_World
- OLED_Inverse_Display
- OLED_PrintNumbers
- OLED_Scroll_Left
- OLED_Scroll_Right
- OLED_Z_Display_Driver_Test_Suite
-
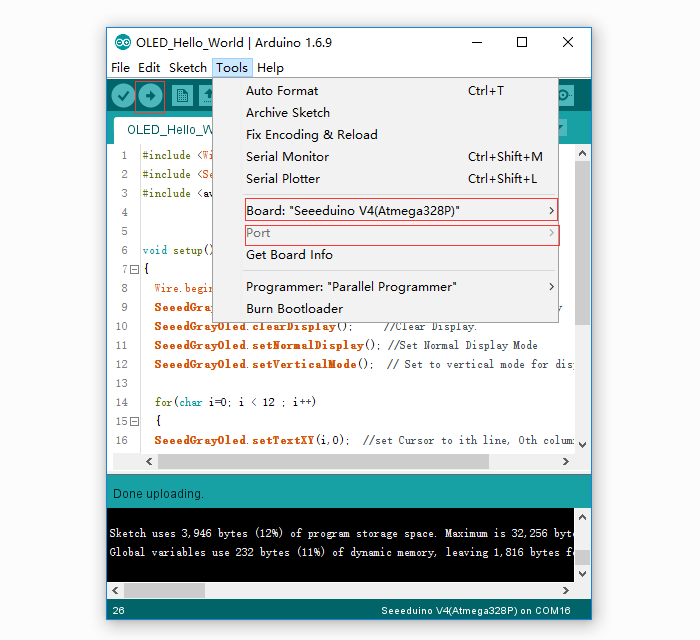
Now let’s try upload OLED_Hello_World to Seeeduino V4. Open your Arduino IDE, click on File > Example > OLED_Display_96x96-master > OLED_Hello_World

- When the code is open, select the right board and right COM Port, then click on Upload button which will take few seconds.
-
If the code is uploaded correctly, you will see the hello world on the OLELD.

-
Then please try the other examples to see what will happen.
APIs of the library
Seeed Gray OLED library provides complete software interfaces to exercise the capabilities of SSD1327Z driver with a 96x96 gray OLED. Almost all useful features are implemented and all functions are in public scope. This makes Seeed Gray OLED Library extensible. Seeed Gray OLED library uses Arduino Wire library. Hence initialize wire library before initializing Seeed OLED library.
init()
Initializes the Seeed OLED frame and sets the display to Normal mode.
Example:
SeeedGrayOled.init(); //initialze SEEED Gray OLED display
clearDisplay()
Clears the whole screen. Should be used before starting a fresh start or after scroll deactivation. This function also sets the cursor to top left corner.
Example:
SeeedGrayOled.clearDisplay(); //clear the screen and set start position to top left corner
setNormalDisplay()
Configures the display to normal mode(non-inverse) mode.
Example:
SeeedGrayOled.setNormalDisplay();//Set display to normal mode (i.e non-inverse mode)
setContrastLevel(unsigned char ContrastLevel)
Set the contrast ratio of OLED display. ContrastLevel can be any number from 0 - 255. Example:
SeeedGrayOled.setContrastLevel(127); //Set display contrast ratio to half level( i.e 256/2 1 ).
setInverseDisplay()
Configures the display to inverse mode. Example:
SeeedGrayOled.setInverseDisplay(); //Set display to inverse mode
setHorizontalMode()
Configures the display to horizontal addressing mode. Example:
SeeedGrayOled.setHorizontalMode(); //Set addressing mode to Horizontal Mode
setVerticalMode()
Configures the display to vertical addressing mode. Texts are drawn in vertical mode. Please set the display to vertical mode before printing text. Example:
SeeedGrayOled.setVerticalMode(); //Set addressing mode to Vertical Mode
setTextXY(X,Y)
Set the text’s position (cursor) to Xth Text Row, Yth Text Column.96x96 OLED is divided into 12 rows and 12 Columns of text. This row and column should not be confused with OLED Row and Column.
- X can be any number from 0 - 11.
- Y can be any number from 0 - 11.
Example:
SeeedGrayOled.setTextXY(0,0); //Set the cursor to 0th Text Row, 0th Text Column
putChar(unsigned char c)
Print a character to OLED display starting from current address-pointer set by setTextXY(X,Y). This function is internally used by putString().
Example:
SeeedGrayOled.putChar('S'); //Print the character S
putString(cont char *string)
Print string to OLED display starting from current address-pointer set by setTextXY(X,Y) Example:
SeeedGrayOled.putString("Hello World!"); //Print the String
putNumber(long n)
Print numbers to OLED display starting from current address-pointer set by setTextXY(X,Y). Number can be any char,int or long datatype. It also takes care of -ve sign.
Example:
SeeedGrayOled.putNumber(-56123); //Print number -56123
drawBitmap(unsigned char *bitmaparray, int bytes)
Display a binary bitmap on the OLED matrix. The data is provided through a pointer to uni-dimensional array holding bitmap. The bitmap data is available in continuous rows of columns as like Horizontal Addressing mode. bytes is size of bitmap in bytes.
Example:
SeeedGrayOled.drawBitmap(SeeedLogo,96*96/8); // Draw binary Bitmap (96 pixels *96 pixels / 8) bytes
setHorizontalScrollProperties
Set the properties of horizontal scroll.
- Direction can be any of Scroll_Left and Scroll_Right.
- startRow can be 0 - 127
- endRow can be 0 - 127. It should be greater than startRow
- startColumn can be 0 - 63
- endColumn can be 0 - 63. It should be greater than startRow
- scrollSpeed can be any of defines:Scroll_2Frames, Scroll_3Frames, Scroll_4Frames, Scroll_5Frames, Scroll_25Frames,Scroll_64Frames, Scroll_128Frames,Scroll_256Frames.
Example:
SeeedGrayOled.setHorizontalScrollProperties(Scroll_Left,72,95,0,47,Scroll_5Frames); //Set the properties of Horizontal Scroll
activateScroll()
Enable scrolling. This should be used only after setting horizontal scroll properties. Example:
SeeedGrayOled.activateScroll(); //Enable scrolling.
deactivateScroll()
Disable scrolling. This should be used after activateScroll(); Example:
SeeedGrayOled.activateScroll(); //Disable scrolling.
Resources
- [Eagle] Grove-OLED Display 1.12inch in Eagle
- [PDF] Grove-OLED Display 1.12inch Sch
- [PDF] Grove-OLED Display 1.12inch PCB
- [Library] Github Repository of the Library
- [Datasheet] SSD1327 Datasheet
- [Datasheet] LY120 Datasheet
- [Datasheet] SH1107G_datasheet
- [Tool] Reference for Make a 96x96 Image
| Arduino | Wio | BeagleBone | Raspberry Pi | LinkIt ONE |
|---|---|---|---|---|
Caution
The platforms mentioned above as supported is/are an indication of the module's hardware or theoritical compatibility. We only provide software library or code examples for Arduino platform in most cases. It is not possible to provide software library / demo code for all possible MCU platforms. Hence, users have to write their own software library.
Help us make it better
Welcome to the new documentation system of Seeed Studio. We have made a lot of progress comparing to the old wiki system and will continue to improve it to make it more user friendly and helpful. The improvement can't be done without your kindly feedback. If you have any suggestions or findings, you are most welcome to submit the amended version as our contributor via Github or give us suggestions in the survey below, it would be more appreciated if you could leave your email so that we can reply to you. Happy Hacking!