Grove - MOSFET
Introduction
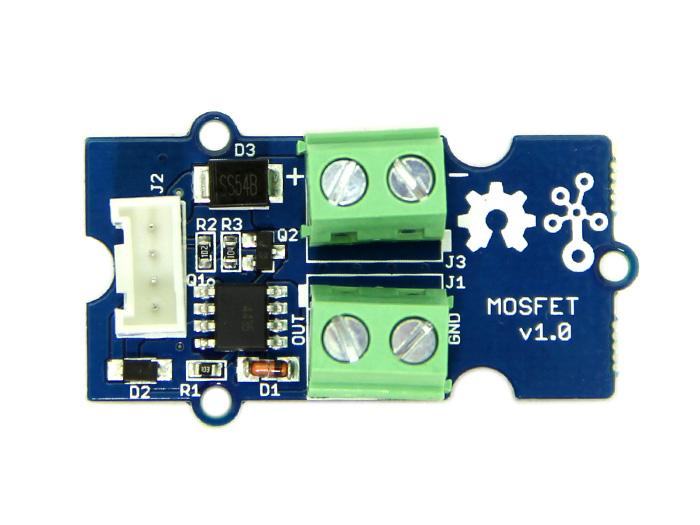
Grove – MOSFET enables you to control higher voltage project, say 15VDC, with low voltage, say 5V, on microcontroller. MOSFET is also a kind of switch, but its switching frequency can reach up to 5MHz, much faster than normal mechanical relay. There are two screw terminals on the board. One for outer power source and the other for device you want to control. Grove – MOSFET will pass the power from one end to another when closed. But if outer power source is absent, your device can still draw power from microcontroller via the Grove interface.

Specifications
- Working voltage: 5V
- Vin: 5 ~ 15V
- MOSFET Model: CJQ4435
Tip
More details about Grove modules please refer to Grove System
Platforms Supported
Hardware Overview
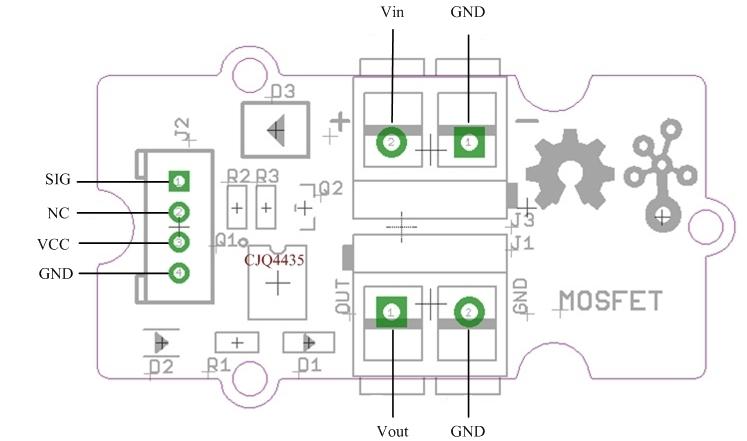
Vin: Accepts 5V ~ 15V power of which current is less than 2A.
Vout: Attach actuators here.
Demonstration
With Arduino
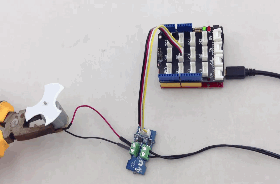
Here we demonstrate how to use Grove - MOSFET to control a motor. We provide power for it with external power source, but if your controlled device needs current smaller than 300mA, Seeeduino can totally support it and no extra power source needed.
    // demo of Grove - MOSFET
    // use pin 6 to control a motor

    int motorPin = 6;

    void setup()
    {
        Serial.begin(38400);
        pinMode(motorPin, OUTPUT);
        Serial.println("Grove - MOSFET Test Demo!");
    }

    void loop()
    {
        motorOnThenOffWithSpeed();
        motorAcceleration();
    }

    void motorOnThenOffWithSpeed()
    {
        int onSpeed  = 200;                         // a number between 0 (stopped) and 255 (full speed)
        int onTime   = 2500;
        int offSpeed = 50;                          // a number between 0 (stopped) and 255 (full speed)
        int offTime  = 1000;
        analogWrite(motorPin, onSpeed);
        delay(onTime);
        analogWrite(motorPin, offSpeed);
        delay(offTime);
    }

    void motorAcceleration()
    {
        int delayTime = 50;
        for(int i=0; i<256; i++)
        {
            analogWrite(motorPin, i);
            delay(delayTime);
        }

        for(int i=255; i>=0; i--)
        {
            analogWrite(motorPin, i);
            delay(delayTime);
        }
    }
With Raspberry Pi
1.You should have a raspberry pi and a grovepi or grovepi+.
2.You should have completed configuring the development enviroment, otherwise follow here.
3.Connection
- Plug the sensor to grovepi socket D6 by using a grove cable.
4.Navigate to the demos’ directory:
cd yourpath/GrovePi/Software/Python/
- To see the code
nano grove_mosfet.py # "Ctrl+x" to exit #
    import time
    import grovepi

    # Connect the Grove MOSFET to analog port D6
    # SIG,NC,VCC,GND
    mosfet = 6

    grovepi.pinMode(mosfet,"OUTPUT")
    time.sleep(1)

    while True:
        try:
            # Full speed
            grovepi.analogWrite(mosfet,255)
            print "full speed"
            time.sleep(2)

            # Half speed
            grovepi.analogWrite(mosfet,128)
            print "half speed"
            time.sleep(2)

            # Off
            grovepi.analogWrite(mosfet,0)
            print "off"
            time.sleep(2)

        except KeyboardInterrupt:
            grovepi.analogWrite(mosfet,0)
            break
        except IOError:
            print "Error"
5.Run the demo.
sudo python grove_mosfet.py
Resources
| Arduino | Wio | BeagleBone | Raspberry Pi | LinkIt ONE |
|---|---|---|---|---|
Caution
The platforms mentioned above as supported is/are an indication of the module's hardware or theoritical compatibility. We only provide software library or code examples for Arduino platform in most cases. It is not possible to provide software library / demo code for all possible MCU platforms. Hence, users have to write their own software library.
Help us make it better
Welcome to the new documentation system of Seeed Studio. We have made a lot of progress comparing to the old wiki system and will continue to improve it to make it more user friendly and helpful. The improvement can't be done without your kindly feedback. If you have any suggestions or findings, you are most welcome to submit the amended version as our contributor via Github or give us suggestions in the survey below, it would be more appreciated if you could leave your email so that we can reply to you. Happy Hacking!