Grove - GPS
Introduction
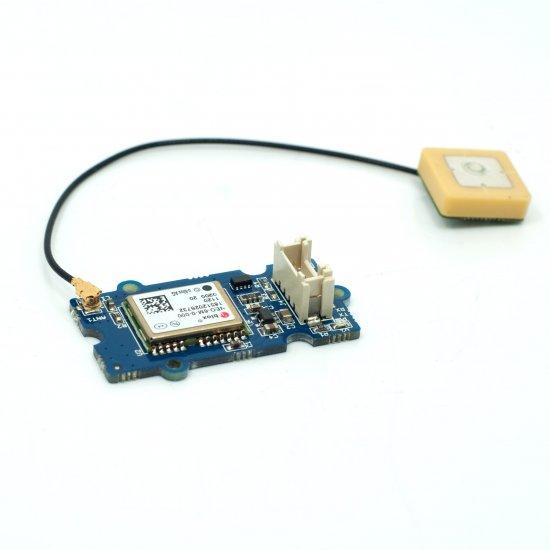
This Grove - GPS module is a cost-efficient and field-programmable gadget armed with a SIM28 (u-blox 6 is the old version) and serial communication configuration. It features 22 tracking / 66 acquisition channels GPS receiver. The sensitivity of tracking and acquisition both reach up to -160dBm, making it a great choice for personal navigation projects and location services, as well as an outstanding one among products of the same price class.

Features
- Supports NMEA and u-blox 6 protocols. ( Till Jan,10 2014, after that SIM28 instead)
- Low power consumption
- Baud rates configurable
- Grove compatible interface
Tip
More details about Grove modules please refer to Grove System
Specifications
| Parameter | Range/Value |
|---|---|
| Input Voltage | 3.3/5V |
| BaudRate | 4800 - 57600(u-blox version) |
| BaudRate | 9600 - 115200(SIM28 version) |
| Default BaudRate | 9600 |
Platforms Supported
Getting Started
Following Grove system to help the user getting started with Grove.
With Arduino
This sample simply reads from the GPS by using software serial and sends it back on the serial port.
Connection
Here we will show you how this Grove - GPS works via a simple demo. First of all, we need to prepare the below stuffs:
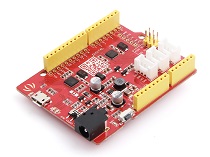
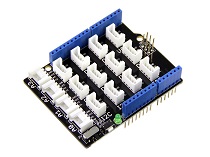
| Seeeduino V4 | Grove - GPS | Base Shield |
|---|---|---|
 |
 |
 |
| Get ONE Now | Get ONE Now | Get ONE Now |
- Connect the Grove-GPS to Digital Port 2 on the Grove - Base Shield by using a Grove Universal 4 pin cable.
- Plug the base Shield into Seeeduino-V4.
- Connect Arduino to PC by using a USB cable.

Software
Note
Please note that the u-center software is for windows only.
- Install u-center software.
- Upload the code below to your Arduino/Seeeduino.
#include <SoftwareSerial.h>
SoftwareSerial SoftSerial(2, 3);
unsigned char buffer[64];                   // buffer array for data receive over serial port
int count=0;                                // counter for buffer array
void setup()
{
    SoftSerial.begin(9600);                 // the SoftSerial baud rate
    Serial.begin(9600);                     // the Serial port of Arduino baud rate.
}

void loop()
{
    if (SoftSerial.available())                     // if date is coming from software serial port ==> data is coming from SoftSerial shield
    {
        while(SoftSerial.available())               // reading data into char array
        {
            buffer[count++]=SoftSerial.read();      // writing data into array
            if(count == 64)break;
        }
        Serial.write(buffer,count);                 // if no data transmission ends, write buffer to hardware serial port
        clearBufferArray();                         // call clearBufferArray function to clear the stored data from the array
        count = 0;                                  // set counter of while loop to zero
    }
    if (Serial.available())                 // if data is available on hardware serial port ==> data is coming from PC or notebook
    SoftSerial.write(Serial.read());        // write it to the SoftSerial shield
}


void clearBufferArray()                     // function to clear buffer array
{
    for (int i=0; i<count;i++)
    {
        buffer[i]=NULL;
    }                      // clear all index of array with command NULL
}
- Open U-center.
- Click Receiver -> Port and select the COM port that the Arduino is using.
- Click Receiver -> Baudrate and make sure 9600 is selected.
- Click View -> Text Console and you should get a window that will stream NMEA data.
- Open the serial monitor,You can see as show below:

We also can view data in Google Earth:
- Click File -> Database Export -> Google Earth KML
- This should launch Google Earth with the history that was captured by u-center.
- Alternatively, data can be recorded by pressing the red circle on the toolbar which will then ask where you want to save the record.
- When we have captured enough data, click the black square to stop recording.
- We can then convert the .ubx file generated to KML by using uploading the ubx file to GPSVisualizer.
With Raspberry Pi
Connection
First of all, we need to prepare the below stuffs:
| Raspberry pi | Grove - GPS | GrovePi_Plus |
|---|---|---|
 |
|
 |
| Get ONE Now | Get ONE Now | Get ONE Now |
- Follow instruction to configure the development environment.
- Plug the sensor to grovepi+ socket RPISER by using a grove cable.

Software
- Navigate to the demos’ directory:
cd yourpath/GrovePi/Software/Python/
- To see the code
nano grove_gps.py # "Ctrl+x" to exit #
import serial, time
import smbus
import math
import RPi.GPIO as GPIO
import struct
import sys
ser = serial.Serial('/dev/ttyAMA0', 9600, timeout = 0) #Open the serial port at 9600 baud
ser.flush()
class GPS:
#The GPS module used is a Grove GPS module http://www.seeedstudio.com/depot/Grove-GPS-p-959.html
inp=[]
# Refer to SIM28 NMEA spec file https://raw.githubusercontent.com/SeeedDocument/Grove-GPS/master/res/SIM28_DATA_File.zip
GGA=[]
#Read data from the GPS
def read(self):
while True:
GPS.inp=ser.readline()
if GPS.inp[:6] =='$GPGGA': # GGA data , packet 1, has all the data we need
break
time.sleep(0.1)
try:
ind=GPS.inp.index('$GPGGA',5,len(GPS.inp)) #Sometimes multiple GPS data packets come into the stream. Take the data only after the last '$GPGGA' is seen
GPS.inp=GPS.inp[ind:]
except ValueError:
print ""
GPS.GGA=GPS.inp.split(",") #Split the stream into individual parts
return [GPS.GGA]
#Split the data into individual elements
def vals(self):
time=GPS.GGA[1]
lat=GPS.GGA[2]
lat_ns=GPS.GGA[3]
long=GPS.GGA[4]
long_ew=GPS.GGA[5]
fix=GPS.GGA[6]
sats=GPS.GGA[7]
alt=GPS.GGA[9]
return [time,fix,sats,alt,lat,lat_ns,long,long_ew]
g=GPS()
f=open("gps_data.csv",'w') #Open file to log the data
f.write("name,latitude,longitude\n") #Write the header to the top of the file
ind=0
while True:
try:
x=g.read() #Read from GPS
[t,fix,sats,alt,lat,lat_ns,long,long_ew]=g.vals() #Get the individial values
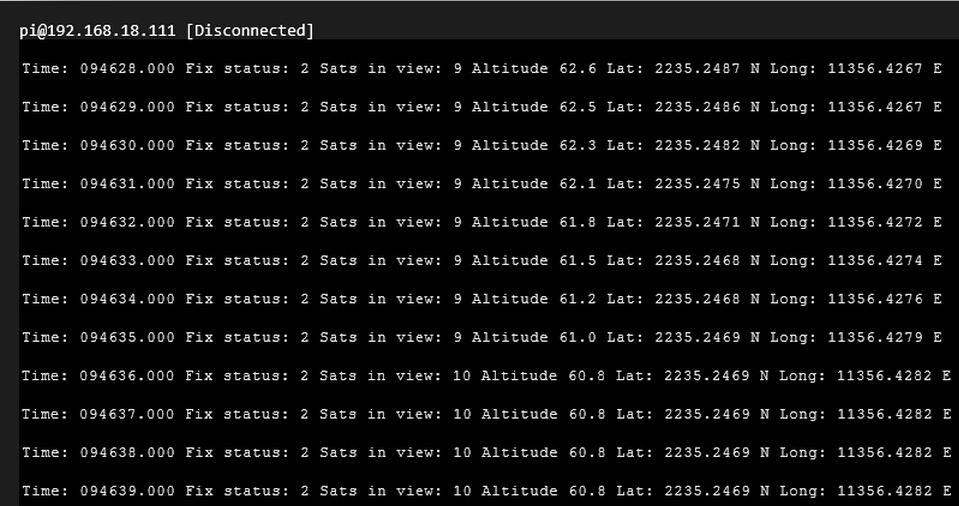
print "Time:",t,"Fix status:",fix,"Sats in view:",sats,"Altitude",alt,"Lat:",lat,lat_ns,"Long:",long,long_ew
s=str(t)+","+str(float(lat)/100)+","+str(float(long)/100)+"\n"
f.write(s) #Save to file
time.sleep(2)
except IndexError:
print "Unable to read"
except KeyboardInterrupt:
f.close()
print "Exiting"
sys.exit(0)
- Run the demo.
sudo python grove_gps.py
- Here is the result.
Note
GPS is better used outdoors. It is recommended to put your raspberry pi outside the window or any place outdoors.SIM28 module Note:
- Grove-GPS has change the module as SIM28 which the same footprint as origin version.
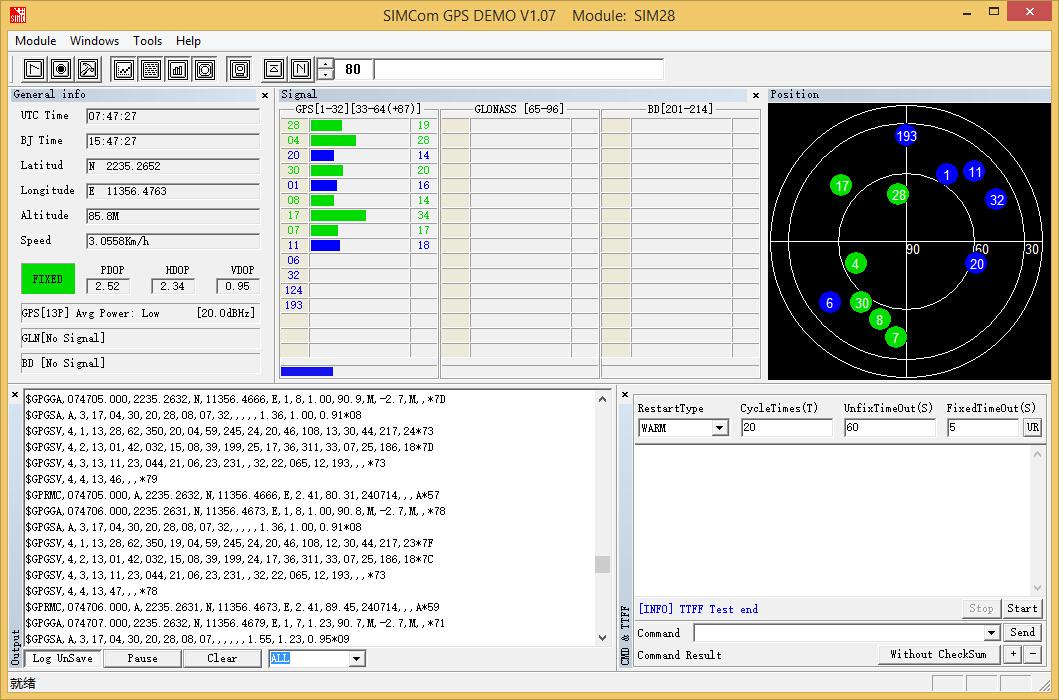
- We should use “SIMCom GPS DEMO” tools to receive SIM28 module data.
- Open SIMCom_GPS_DEMO tools, go to Module->properties->module->select SIM28.
-
SIMCom_GPS_DEMO_V1.07 is for Windows only.
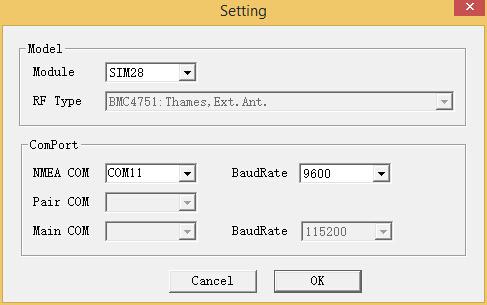
-
Open SIMCom_GPS_DEMO tools, go to Module->connect. Select the serial port which the GPS module used.
Resources
- [Eagle] Grove-GPS Eagle File
- [PDF] GPS Schematic(PDF)
- [Datasheet] E-1612-UB Datasheet
- [Datasheet] U-Blox6 Receiver Description Protocol Spec
- [Software] U-Blox u-center GPS evaluation software
- [Document] SIM28_DATA_File
- [Document] SIMCom_GPS_DEMO_V1.07
| Arduino | Wio | BeagleBone | Raspberry Pi | LinkIt ONE |
|---|---|---|---|---|
Caution
The platforms mentioned above as supported is/are an indication of the module's hardware or theoritical compatibility. We only provide software library or code examples for Arduino platform in most cases. It is not possible to provide software library / demo code for all possible MCU platforms. Hence, users have to write their own software library.
Help us make it better
Welcome to the new documentation system of Seeed Studio. We have made a lot of progress comparing to the old wiki system and will continue to improve it to make it more user friendly and helpful. The improvement can't be done without your kindly feedback. If you have any suggestions or findings, you are most welcome to submit the amended version as our contributor via Github or give us suggestions in the survey below, it would be more appreciated if you could leave your email so that we can reply to you. Happy Hacking!