Grove - Differential Amplifier v1.2
Introduction
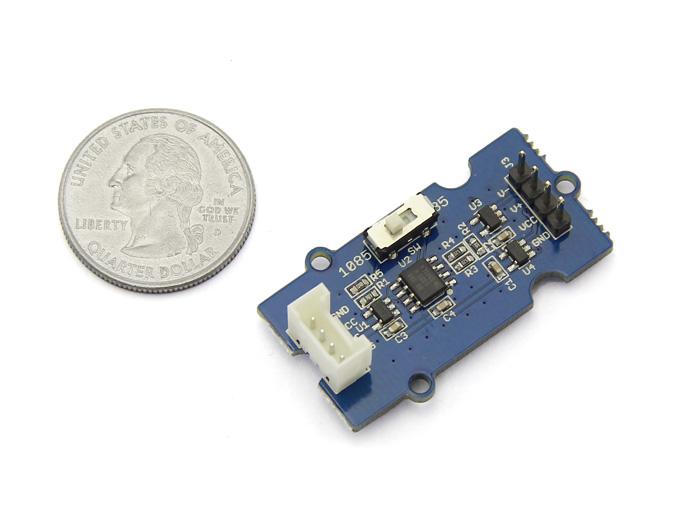
This Grove is designed for precise differential-input amplification. Input the differential signals of your sensor to this module through the male pins, then your Arduino will get a precisely amplified output from the Grove interface. The gain scale factor is selectable. You can get a 35 times or 1085 times amplification via a switch on the board.

Features
- High amplifying precision
- Selectable scale factor
- Can be conveniently read by Arduino
Tip
More details about Grove modules please refer to Grove System
Applications
- Data acquisition
- Battery operated systems
- Pressure and temperature bridge amplifiers
- General purpose instrumentation
Specifications
| Item | Min | Typical | Max | Unit | ||
|---|---|---|---|---|---|---|
| Operating Voltage | 2.7 | 5.0 | 5.5 | VDC | ||
| Input Voltage | 0.1 | \\ | (Vcc-0.8)/Gain | mV | ||
| Output Voltage | 0 | \\ | Vcc-0.80 | mV | ||
| Gain | Select 35 | / | 35 | / | / | |
| Select 1085 | / | 1085 | / | |||
Platforms Supported
Usage
1. Sensor Choosing
The amplifier can turn signals in mA scale up to A scale. Before using it, make sure the output range of your sensor is in mA scale. For example, Weight Sensor is one of them.
2. Connector Reforming
To pair the weight sensor up with the male pins on the amplifier, female connectors need to be soldered on its wires.

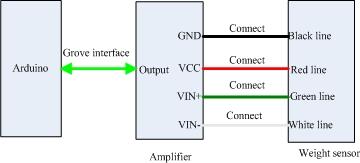
3. Hardware Hookup
Connect the weight sensor to the amplifier as the picture depicts below.
4. Measurement
Copy and paste the demo code below to Arduino IDE and upload it.
    void setup()
    {
      Serial.begin(9600);
      Serial.println("start");
    }

    void loop()
    {
      int i;
      int value;
      float V,Vo;
      float Sum=0;
      for(i=0;i<10;i++)
      {
        value=analogRead(4);
        V=value*5.00/1023;
        Sum+=V;
        delay(10);
      }
      Vo=Sum/10;
      Serial.print("Output score:");
      Serial.println(Vo);
      delay(1000);
    }
You can view the amplified signals via serial monitor. For the value of the input signal, you need to use the multimeter to measure the voltage difference between VIN+ and VIN-.
Resources
| Arduino | Wio | BeagleBone | Raspberry Pi | LinkIt ONE |
|---|---|---|---|---|
Caution
The platforms mentioned above as supported is/are an indication of the module's hardware or theoritical compatibility. We only provide software library or code examples for Arduino platform in most cases. It is not possible to provide software library / demo code for all possible MCU platforms. Hence, users have to write their own software library.
Help us make it better
Welcome to the new documentation system of Seeed Studio. We have made a lot of progress comparing to the old wiki system and will continue to improve it to make it more user friendly and helpful. The improvement can't be done without your kindly feedback. If you have any suggestions or findings, you are most welcome to submit the amended version as our contributor via Github or give us suggestions in the survey below, it would be more appreciated if you could leave your email so that we can reply to you. Happy Hacking!