Grove BLE v1
Introduction
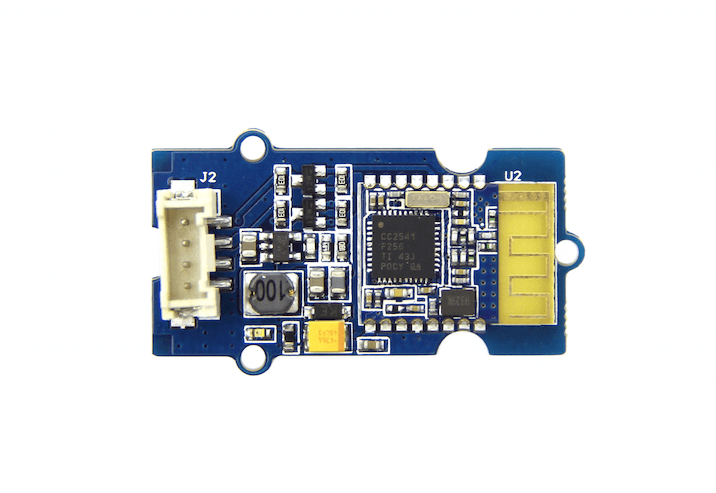
Grove - BLE v1 (Grove - Bluetooth Low Energy v1) uses a Low Energy Bluetooth module – HM-11, based on TI CC2540 chip, which has AT command support. As a Grove product it’s convenient to use Grove - BLE with Arduino board via Base Shield.

Parameters
| Specifications | Name |
|---|---|
| BT Version | Bluetooth Specification V4.0 BLE |
| Working frequency | 2.4GHz ISM band |
| Modulation method | GFSK(Gaussian Frequency Shift Keying) |
| RF Power | -23dbm, -6dbm, 0dbm, 6dbm, can modify through AT Command AT+POWE |
| Speed | Asynchronous: 6K Bytes, Synchronous: 6K Bytes |
| Sensitivity | ≤-84dBm at 0.1% BER |
| Security | Authentication and encryption |
| Service | Central & Peripheral UUID FFE0,FFE1 |
| Supply Power | 3.3v - 5v |
| Working temperature | –5 ~ +65 Centigrade |
| Size | 40cm x 20cm |
| Working Current | < 10 mA |
| Sourcing Current | < 20 mA |
| Sleeping Current | < 1 mA |
Attention
The supply power of HM-11 is 3.3v, but the Grove - BLE is 3.3V to 5V.Tip
More details about Grove modules please refer to Grove System
Platforms Supported
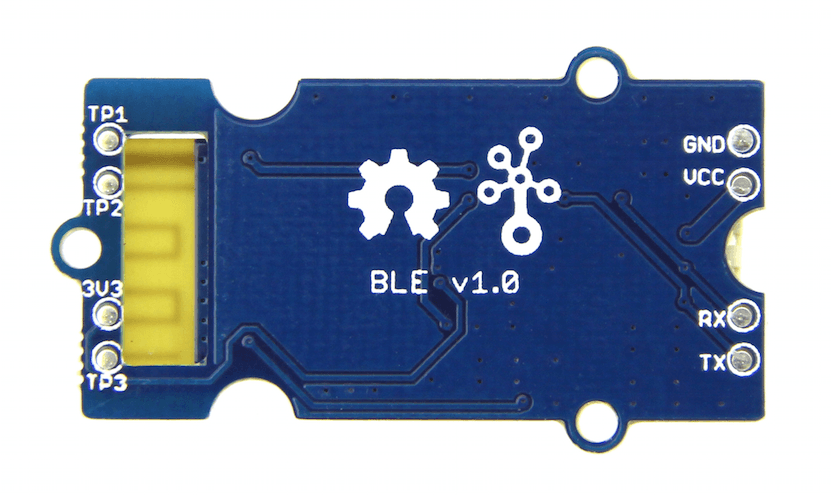
Pinout
Grove connector has four wires: GND, VCC, RX, TX.
Features of Design
We have used TD6810 chip as the voltage regulator, so the range of the supply power can be 3.3v to 5v. Also , there’s a level shift circuit which make sure the accuracy of data transmission.
AT Commands
1)Query module address
Send: AT+ADDR?
Receive:OK+LADD:address
2) Query baud rate
Send:AT+BAUD?
Receive:OK+Get:[para1]
Range: 0~8; 0–9600,1–19200,2–38400,3–57600,4–115200,5–4800,6–2400,7–1200,8–230400
Default: 0–9600.
Set baud rate
Send:AT+BAUD[para1]
Receive:OK+Set:[para1]
Ex.:Send :AT+BAUD1 ,Receive:OK+Set:1. The Baud rate has been set to 19200
Note
If setup to a value 7, After next power on, module will not support any AT Commands, until PIO0 is pressed, Module will change Baud to 9600.3) Try connect an address
Send:AT+CON[para1]
Receive:OK+CONN[para2]
Range :A,E,F
Ex.:Try to connect an device which MAC address is 00:17:EA:09:09:09
Send: AT+CON0017EA090909
May receive a reply: OK+CONNA –> Accept request, connecting ; OK+CONNE –> Connect error ; OK+CONN –> Connected , if AT+NOTI1 is setup ; OK+CONNF –> Connect Failed , After 10 seconds
Note
Only central role is used. If remote device has already connected to other device or shut down, “OK+CONNF” will received after about 10 Seconds.4) Clear Last Connected device address
Send:AT+CLEAR
Receive:OK+CLEAR
5) Query Module Work Mode
Send:AT+MODE?
Receive:OK+Get:[para]
Range: 0~2;
0–Transmission Mode, 1–PIO collection Mode + Mode 0, 2–Remote Control Mode + Mode 0 .
Default: 0
Set Module Work Mode
Send:AT+MODE[]
Receive:OK+Set:[para]
6) Query Module name
Send:AT+NAME?
Receive:OK+NAME[para1]
Set Module name
Send:AT+NAME[para1]
Receive:OK+Set:[para1]
Ex.:Send: AT+NAMESeeed, Receive : OK+Set:Seeed
Note
Name would change after next power on.7) Query Pin Code
Send:AT+PASS?
Receive:OK+PASS:[para1]
Range : 000000~999999.
Default : 000000.
Set Pin Code
Send: AT+PASS[para1]
Receive:OK+Set:[para1]
8) Restore all setup value to factory setup
Send:AT+RENEW
Receive:OK+RENEW
9) Restart module
Send:AT+RESET
Receive:OK+RESET
10)Query Master and Slaver Role
Send:AT+ROLE[para1]
Receive:OK+Set:[para1]
Range : 0~1;
0–Peripheral : 1–Central : Default: 0.
More AT commands please refer to the Datasheet of BLE module.
SoftwareSerial Communication
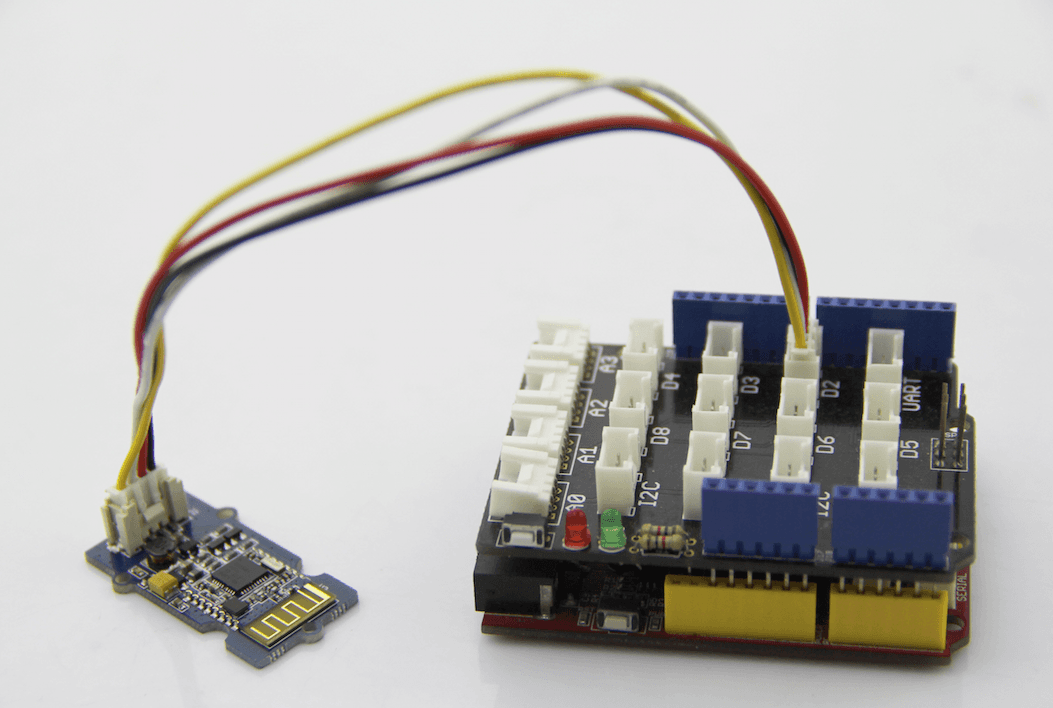
Grove - BLE can be used as a master or slave, you can use the one via different demos.If you are going to use the following SoftwareSerial program, please refer to the way of connection in the previous pic. TX–>D2, RX–>D3.
Open Arduino IDE, copy the following program and upload it onto the Arduino/Seeeduino board. And then two BLE modules can communicate with each other.
Demo : BLE Slave
    #include <SoftwareSerial.h>   //Software Serial Port
    #define RxD 2
    #define TxD 3

    #define DEBUG_ENABLED  1

    SoftwareSerial BLE(RxD,TxD);

    void setup()
    {
      Serial.begin(9600);
      pinMode(RxD, INPUT);
      pinMode(TxD, OUTPUT);
      setupBleConnection();

    }

    void loop()
    {
      char recvChar;
      while(1){
        if(BLE.available()){//check if there's any data sent from the remote BLE
          recvChar = BLE.read();
          Serial.print(recvChar);
        }
        if(Serial.available()){//check if there's any data sent from the local serial terminal, you can add the other applications here
          recvChar  = Serial.read();
          BLE.print(recvChar);
        }
      }
    }

    void setupBleConnection()
    {
      BLE.begin(9600); //Set BLE BaudRate to default baud rate 9600
      BLE.print("AT+CLEAR"); //clear all previous setting
      BLE.print("AT+ROLE0"); //set the bluetooth name as a slaver
      BLE.print("AT+SAVE1");  //don't save the connect information
    }
Demo : BLE Master
    #include <SoftwareSerial.h>   //Software Serial Port
    #define RxD 2
    #define TxD 3

    #define DEBUG_ENABLED  1

    SoftwareSerial BLE(RxD,TxD);

    void setup()
    {
      Serial.begin(9600);
      pinMode(RxD, INPUT);
      pinMode(TxD, OUTPUT);
      setupBleConnection();

    }

    void loop()
    {
      char recvChar;
      while(1){
        if(BLE.available()){//check if there's any data sent from the remote BLE
          recvChar = BLE.read();
          Serial.print(recvChar);
        }
        if(Serial.available()){//check if there's any data sent from the local serial terminal, you can add the other applications here
          recvChar  = Serial.read();
          BLE.print(recvChar);
        }
      }
    }

    void setupBleConnection()
    {
      BLE.begin(9600); //Set BLE BaudRate to default baud rate 9600
      BLE.print("AT+CLEAR"); //clear all previous setting
      BLE.print("AT+ROLE1"); //set the bluetooth name as a master
      BLE.print("AT+SAVE1");  //don't save the connect information
    }
Resources
| Arduino | Wio | BeagleBone | Raspberry Pi | LinkIt ONE |
|---|---|---|---|---|
Caution
The platforms mentioned above as supported is/are an indication of the module's hardware or theoritical compatibility. We only provide software library or code examples for Arduino platform in most cases. It is not possible to provide software library / demo code for all possible MCU platforms. Hence, users have to write their own software library.
Help us make it better
Welcome to the new documentation system of Seeed Studio. We have made a lot of progress comparing to the old wiki system and will continue to improve it to make it more user friendly and helpful. The improvement can't be done without your kindly feedback. If you have any suggestions or findings, you are most welcome to submit the amended version as our contributor via Github or give us suggestions in the survey below, it would be more appreciated if you could leave your email so that we can reply to you. Happy Hacking!