Arduino Software I2C user guide
Introduction
The standard I2C library for the Arduino is the Wire library. While this library is sufficient most of the time, there are situations when it cannot be used:
- the I2C pins A4/A5 (or SDA/SCL) are in use already for other purposes
- same I2C addresses devices are used
So we write the SoftwareI2C library to use digit port and analog port to enable multiple same I2C addresses devices work on Arduino.
Install SoftwareI2C Library
- Please follow how to install an arduino library procedures to install library.
- We provide an Arduino Library for SoftwareI2C, click on here to download it.
Example#1: Scan I2C device address
Connection
Here we will show you how this works via a simple demo. First of all, you need to prepare the below stuffs:
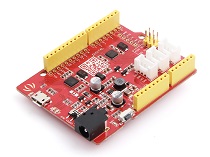
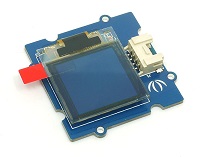
| Seeeduino V4 | Grove - OLED Display 1.12`` | Base Shield |
|---|---|---|
 |
 |
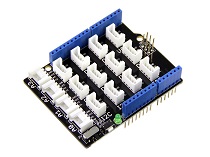 |
| Get ONE Now | Get ONE Now | Get ONE Now |
This is an easy-to-use module, what you need to do is connect the module to D2 port of a Base Shield.

If you don’t have the base shield, please follow below connection.
| Arduino Pin | OLED Pin |
|---|---|
| Digit 3 | SDA |
| Digit 2 | SCL |
| VCC | VCC |
| GND | GND |
Software
- Open the code directly by the path: File -> Example ->Arduino_Software_I2C-master->SoftwareI2C_Scan.

#include "SoftwareI2C.h"

SoftwareI2C softwarei2c;

void setup()
{
    Serial.begin(115200);
    softwarei2c.begin(3, 2);       // sda, scl
    Serial.println("begin to scan...");
}

void loop()
{
    for(unsigned char i=1; i<=127; i++)
    {
        if(softwarei2c.beginTransmission(i))
        {
            Serial.print("0x");
            Serial.println(i, HEX);

            while(1);
        }
        softwarei2c.endTransmission();
    }

    Serial.println("find nothing");
    while(1);

}
- Upload the code to arduino.
- Please configure serial port baud rate as 115200.
- We can see I2C address from serial port.
Example#2: Display different information on 2 Grove - OLED Display 1.12
Connection
Here we will show you how this works via a simple demo. First of all, you need to prepare the below stuffs:
| Seeeduino V4 | Grove - OLED Display 1.12`` | Base Shield |
|---|---|---|
|
|
|
| Get ONE Now | Get ONE Now | Get ONE Now |
- Connect one Grove - OLED Display 1.12 to D2 port and other to D4 port.

Software
- Click on here to download Grove-OLED-Display-1.12 library.
- Copy SeeedGrayOLED.cpp and SeeedGrayOLED.h to Arduino_Software_I2C-master folder
-
Edit SeeedGrayOLED.cpp
- Step1: Change the library from Wire.h to SoftwareI2C.h
From
#include "Wire.h"
To
#include <SoftwareI2C.h>
- Step2: Add initSoftwareI2C function, we have to change the class name for different products.
void SeeedGrayOLED::initSoftwareI2C(SoftwareI2C *w, int __sda, int __scl)
{
    Wire = w;
    Wire->begin(__sda, __scl);
}
- Step3: Replace all Wire. to Wire-> For example, change Wire.endTransmission() to Wire->endTransmission().
From
Wire.endTransmission();
To
Wire->endTransmission();
-
Edit SeeedGrayOLED.h
- Step1: Change the library Wire.h to SoftwareI2C.h
From
#include "Wire.h"
To
#include <SoftwareI2C.h>
- Step2: Add initSoftwareI2C function into public class
void initSoftwareI2C(SoftwareI2C *w, int __sda, int __scl);
- Step3: Add SoftwareI2C *Wire into private class
SoftwareI2C *Wire;
-
Open the code directly by the path: File -> Example ->Arduino_Software_I2C-master->OLED_Display.

-
We have to define SoftwareI2C objects as well as SeeedGrayOLED objects.
//define 2 SoftwareI2C objects
#include "SoftwareI2C.h"
SoftwareI2C WireS1;
SoftwareI2C WireS2;

//define 2 SeeedGrayOLED objects
#include "SeeedGrayOLED.h"
#include <avr/pgmspace.h>
SeeedGrayOLED SeeedGrayOled1;
SeeedGrayOLED SeeedGrayOled2;
- We use initSoftwareI2C instead of Wire.begin during setup.
SeeedGrayOled1.initSoftwareI2C(&WireS1, 3, 2); // initSoftwareI2C, sda, scl
//define 2 SoftwareI2C objects
#include "SoftwareI2C.h"
SoftwareI2C WireS1;
SoftwareI2C WireS2;

//define 2 SeeedGrayOLED objects
#include "SeeedGrayOLED.h"
#include <avr/pgmspace.h>
SeeedGrayOLED SeeedGrayOled1;
SeeedGrayOLED SeeedGrayOled2;


void setup()
{
  SeeedGrayOled1.initSoftwareI2C(&WireS1, 3, 2);     // initSoftwareI2C, sda, scl

  SeeedGrayOled1.init(SSD1327);
  SeeedGrayOled1.clearDisplay();     //Clear Display.
  SeeedGrayOled1.setNormalDisplay(); //Set Normal Display Mode
  SeeedGrayOled1.setVerticalMode();  // Set to vertical mode for displaying text


  for(char i=0; i < 12 ; i++)
  {
  SeeedGrayOled1.setTextXY(i,0);  //set Cursor to ith line, 0th column
  SeeedGrayOled1.setGrayLevel(i); //Set Grayscale level. Any number between 0 - 15.
  SeeedGrayOled1.putString("11111111"); //Print 11111111
  }


  SeeedGrayOled2.initSoftwareI2C(&WireS2, 5, 4);     // initSoftwareI2C, sda, scl

  SeeedGrayOled2.init(SSD1327);             //initialize SEEED OLED display
  SeeedGrayOled2.clearDisplay();     //Clear Display.
  SeeedGrayOled2.setNormalDisplay(); //Set Normal Display Mode
  SeeedGrayOled2.setVerticalMode();  // Set to vertical mode for displaying text

  for(char i=0; i < 12 ; i++)
  {
  SeeedGrayOled2.setTextXY(i,0);  //set Cursor to ith line, 0th column
  SeeedGrayOled2.setGrayLevel(i); //Set Grayscale level. Any number between 0 - 15.
  SeeedGrayOled2.putString("00000000"); //Print 00000000
  }
}

  void loop()
  {

  }
- Upload to Sketch.
- We will see 11111111 display on one screen while 00000000 is on other.
APIs of the library
- begin() function: SoftwareI2C.begin() must first be called to start any software I2C communication using the SoftwareI2C library.
SoftwareI2C::begin(int Sda, int Scl)
- beginTransmission function: Used when the ATmega is acting as an I2C master. Sets internal variables in the SoftwareI2C library in preparation for transmitting to the given address.
SoftwareI2C.beginTransmission(uchar addr)
- endTransmission() function: end for transmitting to the given address.
SoftwareI2C.endTransmission()
- write function: Populate the send data buffer with the data found in the argument list. there are 2 functions. One is sending a byte and other is array.
SoftwareI2C.write(uchar dta)
SoftwareI2C::write(uchar len, uchar *dta)
- read function: Returns the byte in receive buffer.
SoftwareI2C.read()
References
- [Library]Arduino SoftwareI2C Library
Help us make it better
Welcome to the new documentation system of Seeed Studio. We have made a lot of progress comparing to the old wiki system and will continue to improve it to make it more user friendly and helpful. The improvement can't be done without your kindly feedback. If you have any suggestions or findings, you are most welcome to submit the amended version as our contributor via Github or give us suggestions in the survey below, it would be more appreciated if you could leave your email so that we can reply to you. Happy Hacking!